Medical Devices, Quality & Testing, Regulation & Standards
Troubleshooting Common Problems with Electrosurgical Units in Surgery
Updated
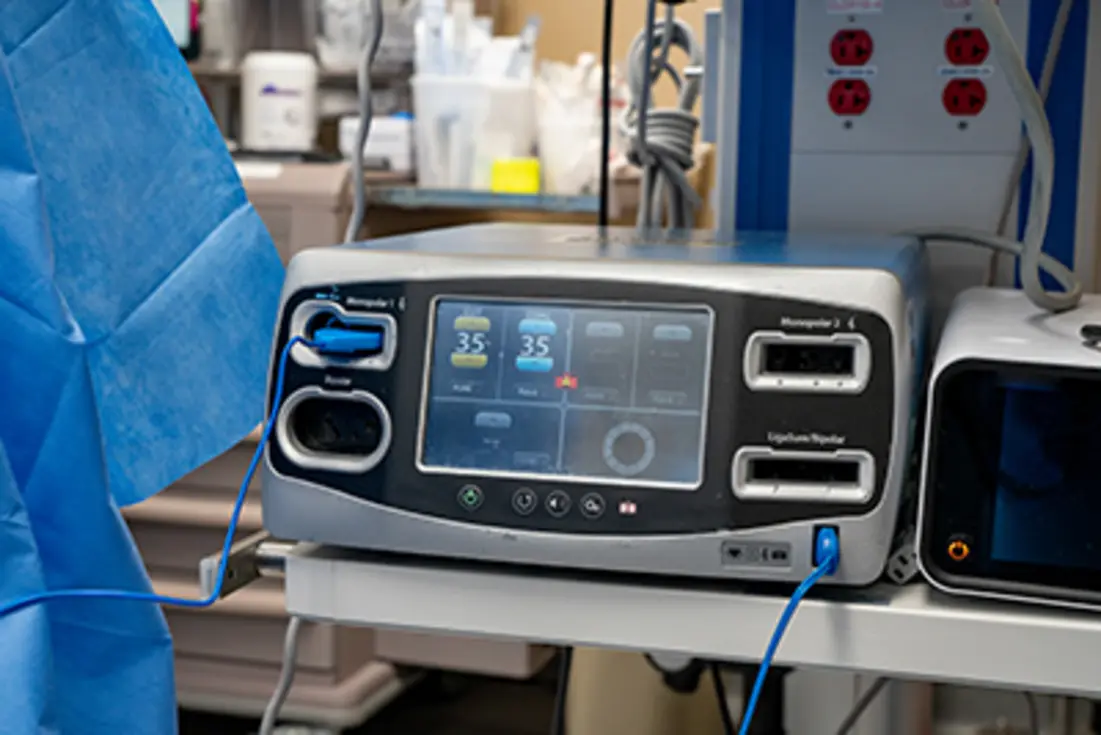
Electrosurgical units (ESUs) are essential for modern surgery, but technical malfunctions can disrupt operations and compromise patient safety. Power loss, inconsistent output, electrode sparking, unwanted tissue burns, and unresponsive footswitches are frequent complaints in operating rooms. This article summarizes proven troubleshooting steps and preventive measures for operating room staff and biomedical engineers facing common ESU issues.
How Electrosurgical Units Work
Understanding basic ESU operation helps isolate faults. Most ESUs consist of:
- A high-frequency (RF) generator
- Logic/control board (selects mode: cut, coag, blend)
- Output circuit (delivers energy to the handpiece)
- Footswitch or hand-activated controls
- Cables and electrodes (active and return/dispersive)
In monopolar mode, current passes from the handpiece through the patient and exits via a large dispersive pad (return electrode). In bipolar mode, current flows only between two electrode tips, usually at the forceps. All components must work as a system for safe, effective energy delivery.
1. Power Loss or ESU Will Not Power On
Symptoms:
- ESU will not start
- Loss of power during surgery
- Intermittent powering off
Action Steps:
- Check Power Source
- Confirm the power cord is fully plugged in at both ends.
- Test the wall outlet with another device to verify room power supply.
- Inspect Cord and Plug
- Look for frays or burns.
- Try using a replacement cord if available.
- Device Breakers and Fuses
- Locate the ESU’s circuit breaker or fuse and reset/replace if blown.
- Device Internal Power Supply
- If external checks do not restore function, internal power supplies or circuit boards may require evaluation by biomedical engineering.
Prevention:
- Schedule regular inspections of power cords and plugs.
- Avoid overloading outlets.
2. Inconsistent or Inaccurate Output
Symptoms:
- Weak, variable, or absent cutting or coagulation effect despite correct settings.
- Device error codes for RF output.
Action Steps:
- Mode and Setting Check
- Confirm the correct mode (cut/coag/blend) and power level per tissue type.
- Reset to a known safe setting, then increase slowly.
- Accessory Inspection
- Examine all cables, connectors, and the handpiece for visible wear or damage.
- Electrode and Cable Connections
- Ensure tight, corrosion-free contacts at all points.
- Switch to a spare electrode and cables to test for improvement.
- Return Electrode Monitoring (REM/Contact Quality Monitoring)
- Confirm the dispersive pad is well-adhered on clean, dry skin, over muscle—not bone or scar tissue. Replace the pad if needed.
- If using a REM system, verify its indicator is functioning and not showing faults.
- ESU Calibration
- Out-of-calibration output may require testing and recalibration by engineering staff.
Prevention:
- Replace accessories at manufacturer’s recommended intervals.
- Routine calibration and quality-assurance testing per facility protocols.
3. Electrode Sparking or Arcing
Symptoms:
- Audible/visible sparks at the electrode tip or during activation
- Charring at surgical site
Action Steps:
- Power Level
- Use the lowest effective power setting for the intended effect. High settings increase arcing risk.
- Clean/Inspect Electrode Tip
- Build-up of eschar (burned tissue) on the tip increases resistance. Clean with a damp sponge—not abrasive pads, which scratch the surface.
- Cables and Device Connections
- Look for exposed wire, loose connector, or damaged sheaths.
- Patient Environment
- Avoid pooling of prepping solutions, irrigants, or flammable agents near electrode or dispersive pad.
- Review Device Placement
- Ensure no contact between cables and metal objects or drapes; reroute as necessary.
Prevention:
- Clean electrodes after every use.
- Check all connections before activation.
4. Unwanted Tissue Burns or Discoloration
Symptoms:
- Tissue burns beyond target area
- Discoloration at or away from the surgical site
- Reports of alternate-site burns
Action Steps:
- Verify Dispersive Pad Placement (Monopolar Mode)
- Pad must be in full contact with well-vascularized, clean, dry, hairy-free skin.
- Avoid placement over bony prominences, scar tissue, or pressure points.
- Never use a pad that is loose, dried-out, or partially detached.
- Review Power and Activation Time
- Use the shortest effective activation and the lowest energy needed.
- Patient Positioning and Insulation
- Ensure the patient is not touching metal objects; remove jewelry; move ECG and other electrodes away from circuit pathway.
- Check for Alternate Return Paths
- If the dispersive pad is not working, current may seek another exit, causing unintended burns.
- Visually inspect the pad and cable for integrity.
Prevention:
- Choose patient pad sites carefully before prepping.
- Double-check dispersive pad adherence before and during surgery.
5. Unresponsive or Intermittent Footswitch
Symptoms:
- ESU does not activate with the footswitch
- Activation is delayed, intermittent, or unreliable
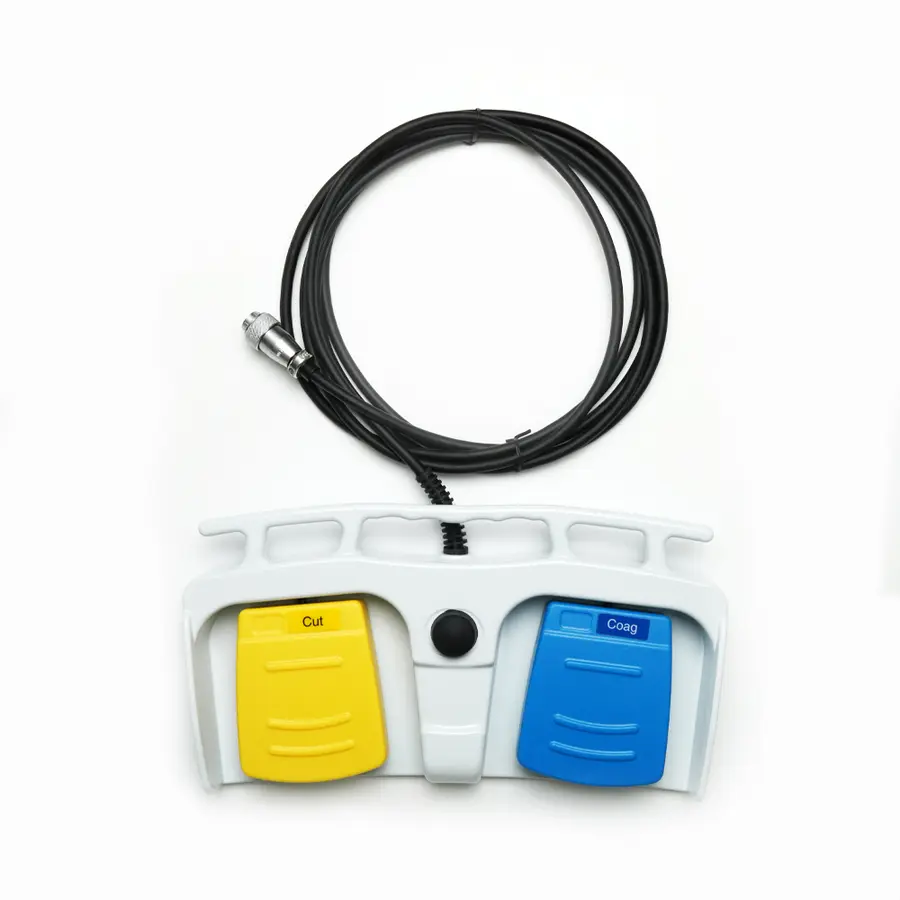
Action Steps:
- Physical Inspection
- Look for fluid contamination, kinks, or breaks in the cord.
- Ensure connector is fully engaged and not bent.
- Cleanliness
- Keep footswitch dry and free of fluids or debris.
- Test with Backup Switch
- Substitute with a spare footswitch if available. If this resolves the issue, replace the original.
- Verify Device Settings
- Confirm footswitch is enabled (some ESUs have selectable hand/foot activation modes).
Prevention:
- Store footswitch off the floor when not in use.
- Avoid placing heavy equipment on switch or cord.
6. Cutting or Coagulation Ineffective
Symptoms:
- Device activates but tissue cutting/coagulation fails or is poor
Action Steps:
- Check Electrode and Mode
- Ensure correct electrode for intended function.
- Double-check mode (cut vs. coag) and adjust as needed.
- Confirm Calibration
- Output may need calibration if routine effectiveness drops.
- Replace Consumables
- Use new, sharp, or undamaged electrodes.
Prevention:
- Replace electrodes and handpieces when wear is visible.
- Annual calibration per manufacturer’s guidelines.
7. Error Codes and Alarms
Modern ESUs display error codes for detected faults.
Action Steps:
- Note and Document Code
- Check the code in the device manual for specific instructions.
- Power Cycle
- A full power-off/wait/on sequence sometimes resolves transient faults.
- Do Not Bypass Alarms
- Never use the unit if a critical fault persists—remove from service for inspection.
Prevention:
- Train staff to recognize codes and escalation procedures.
8. Smoke and Odor Issues
Symptoms:
- Excessive surgical smoke, smells in surgical field
Action Steps:
- Activate Smoke Evacuation
- Use built-in or external smoke evacuation per facility policy.
- Check Electrode Cleaning
- A dirty electrode may contribute to increased smoke.
Prevention:
- Consistently use smoke evacuation in all ESU surgeries.
General Preventive Maintenance for ESUs
- Confirm full functionality and electrical safety before use.
- Schedule routine checks for calibration, output verification, and leakage current tests per manufacturer’s schedule and regulatory standards.
- Maintain accessory and cable quality; replace per manufacturer’s lifespan recommendations.
When to Escalate to Biomedical Engineering
Contact the biomedical or clinical engineering department if:
- Problems persist after above checks
- Internal repairs, calibration, or parts replacement are needed
- You see evidence of circuit board failure, internal burning, or REM (return electrode monitoring) circuit errors
Useful Troubleshooting Checklist
| Issue | First Steps | Common Causes |
|---|---|---|
| No power | Check cord, outlet, fuses | Faulty outlet, blown fuse, bad cord |
| Inconsistent energy output | Reseat accessories, inspect connections | Worn cables, dirty connectors, settings |
| Sparks/arcing | Lower power, clean tip, inspect wires | Eschar, faulty cables, high settings |
| Tissue burns/discoloration | Review pad placement, use correct pad site | Poor pad contact, wrong site/settings |
| Footswitch unresponsive | Swap switch, inspect for damage, dry it | Cord damage, connector fault, spill |
| Error codes/alarms | Note code, reset, check manual | Internal error, requires inspection |
Conclusion
Following these focused troubleshooting steps will help operating room staff and biomedical engineers restore safe ESU function quickly, reducing risks during surgery. Prevention—especially quality checks, good cleaning practices, and correct setup—remains the most reliable way to avoid failures and protect both patients and staff.